
How do you move from paper manufacturing orders and four applications per workstation to a single screen where operators log in, see their priorities, open their production file and report their output? This case study describes, step by step, how production workstations were set up at a window and door manufacturer: flow mapping, definition of each workstation, documents and quality. It is one of our projects with the most far-reaching impact.
Background: an industrial joinery group
Our client is a major player in industrial joinery (windows and doors). Its information system is built around a robust central ERP, with several interconnected local applications around it. The project described here is part of a wider programme, rolled out over two years, which includes a WMS, parcel management, production workstations, a quality module, an HR module for working times and clocking, a remanufacturing module, and integration with the ERP via SFTP and web APIs. From the outset the client set one requirement: to own the solution and avoid recurring licence costs.
The problem: no times, too many applications
The initial assessment brought out four obstacles.
- No tracking of production times. This affected HR management (clocking, staff performance), the costing of operations and planning, for lack of reliable average times per operation.
- Quality not properly under control. Operators lacked diagrams, tutorials and precise instructions at the workstation; there were no systematic checks, so no automatic blocking of a defective product and no notification to the supervisor.
- Too many applications. On some workstations, an operator had to switch between four applications to do the job.
- Ageing tools. Unstable servers, data loss, inability to cope with new production flows.
Setting up production workstations in manufacturing: the three steps
A project team was formed with a project manager, the workshop managers and key operators. Deployment started on a low-volume line, before being extended gradually to the other workshops. The work was organised in three steps.
Step 1: map the production flows
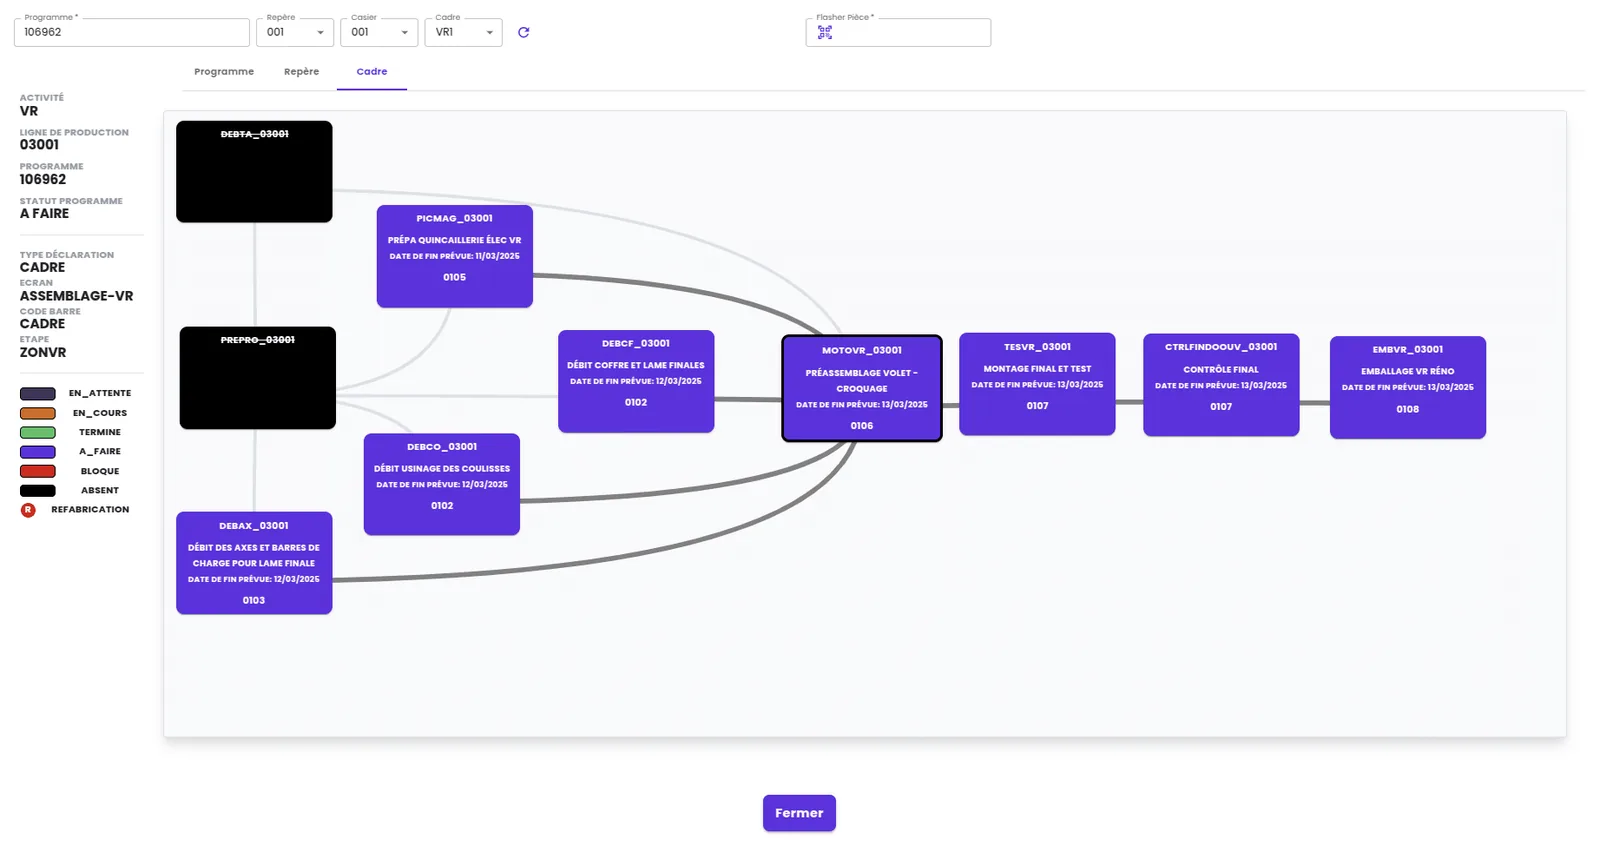
Each workshop manager listed the manufacturing operations in their area and defined what each workstation needs: single or multi-user; reporting mode (programme, multi-programme, frame, multi-frame); type of production screen; information to display; PDF documents and diagrams to bring forward; quality checks to perform; real-time data capture (a temperature, for example); team management on a flow-line workstation. This mapping, described in our case study on production flow mapping, became the backbone of the production software.
Step 2: define each workstation
Each of the client's decisions became a setting, not a line of code: the client remains free to change how a workstation behaves without calling on us. Three login modes were provided.
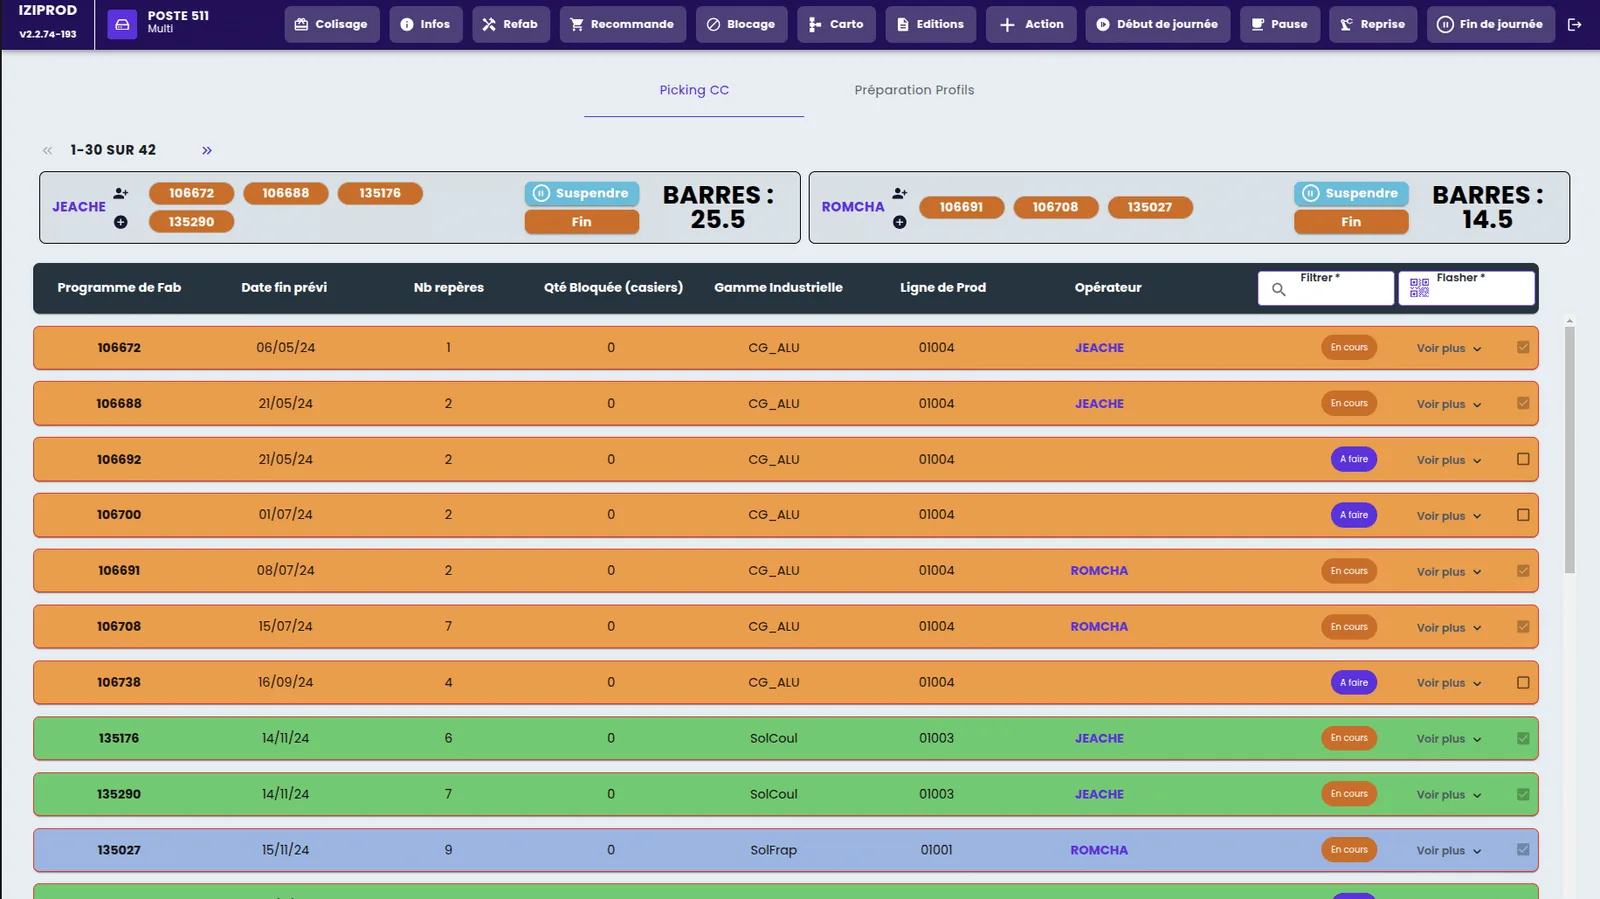
- Single-user: the operator logs in once, and all their actions are recorded under their profile.
- Multi-user: several operators share the workstation and identify themselves for each action.
- Flow-line workstation: a team leader (the glazier) and team members (the glazing bead fitters) work in line, and times are counted for the team.
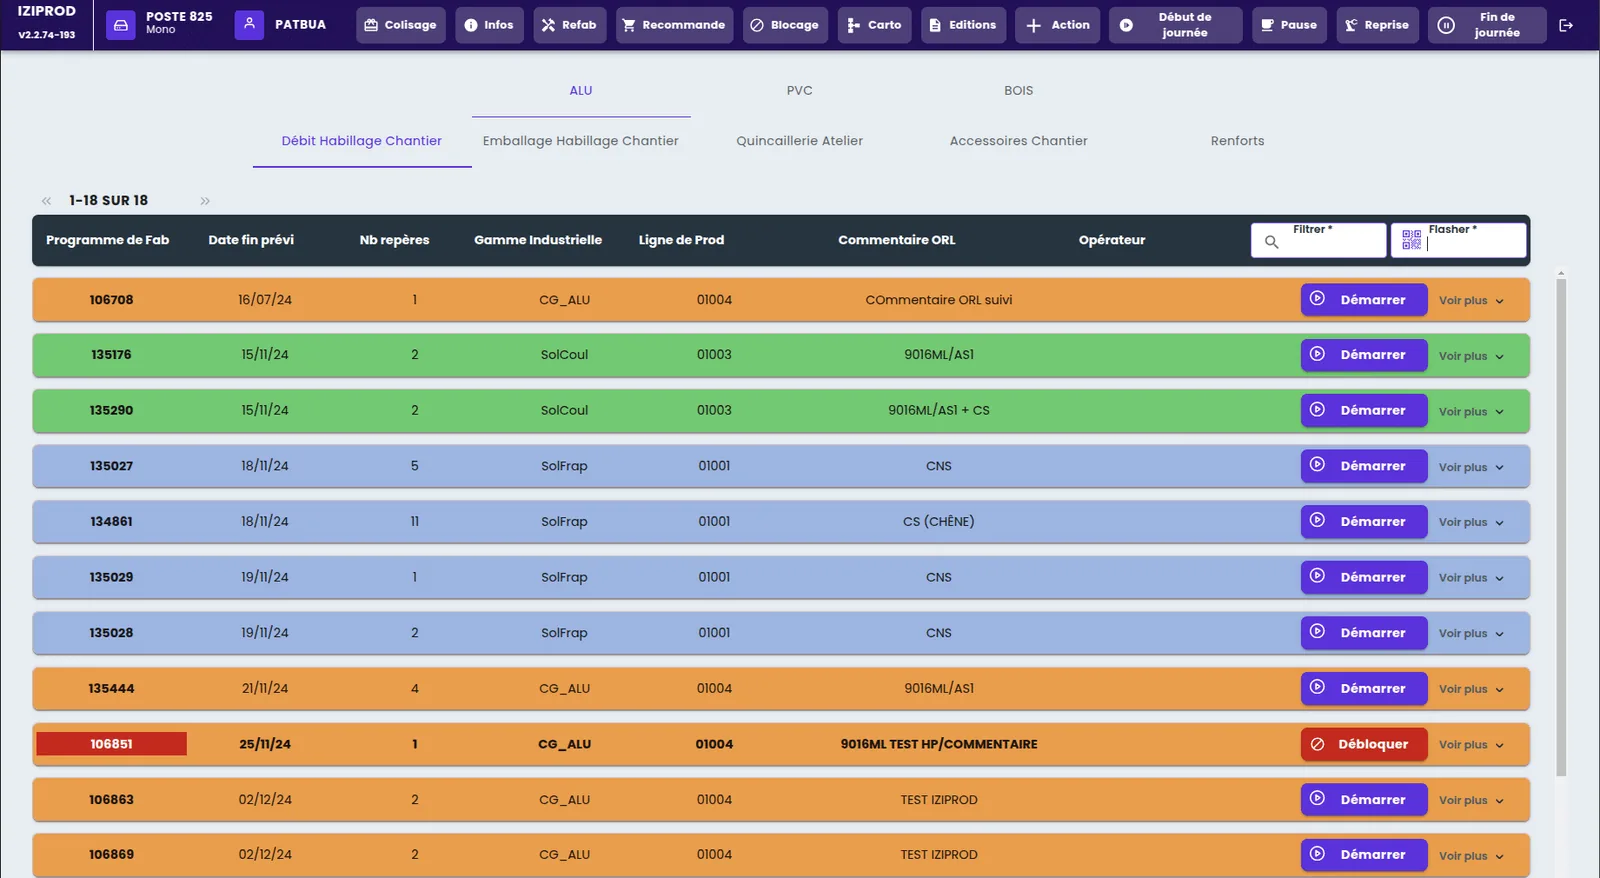
On login, the screen shows the list of manufacturing orders in the sequence set by scheduling, with a colour code per routing that the administrator sets. Reporting then adapts to the nature of the operation:
- Programme: a set of similar manufacturing orders handled in a single report.
- Multi-programme: the operator selects several manufacturing orders for grouped production, such as cutting PVC bars.
- Frame: each window frame is reported one by one.
- Multi-frame: flow-line work, with several operators carrying out tasks in sequence.
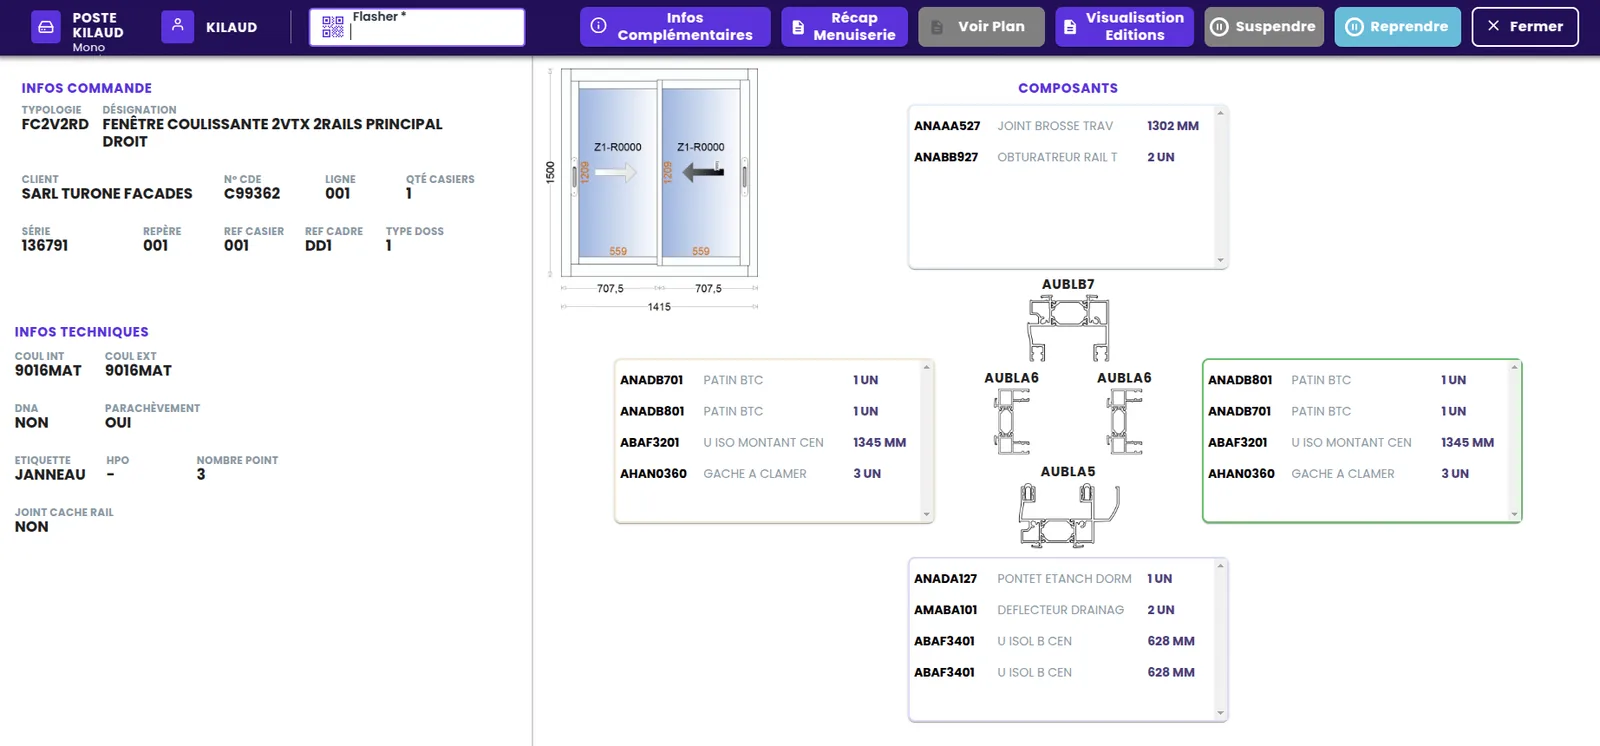
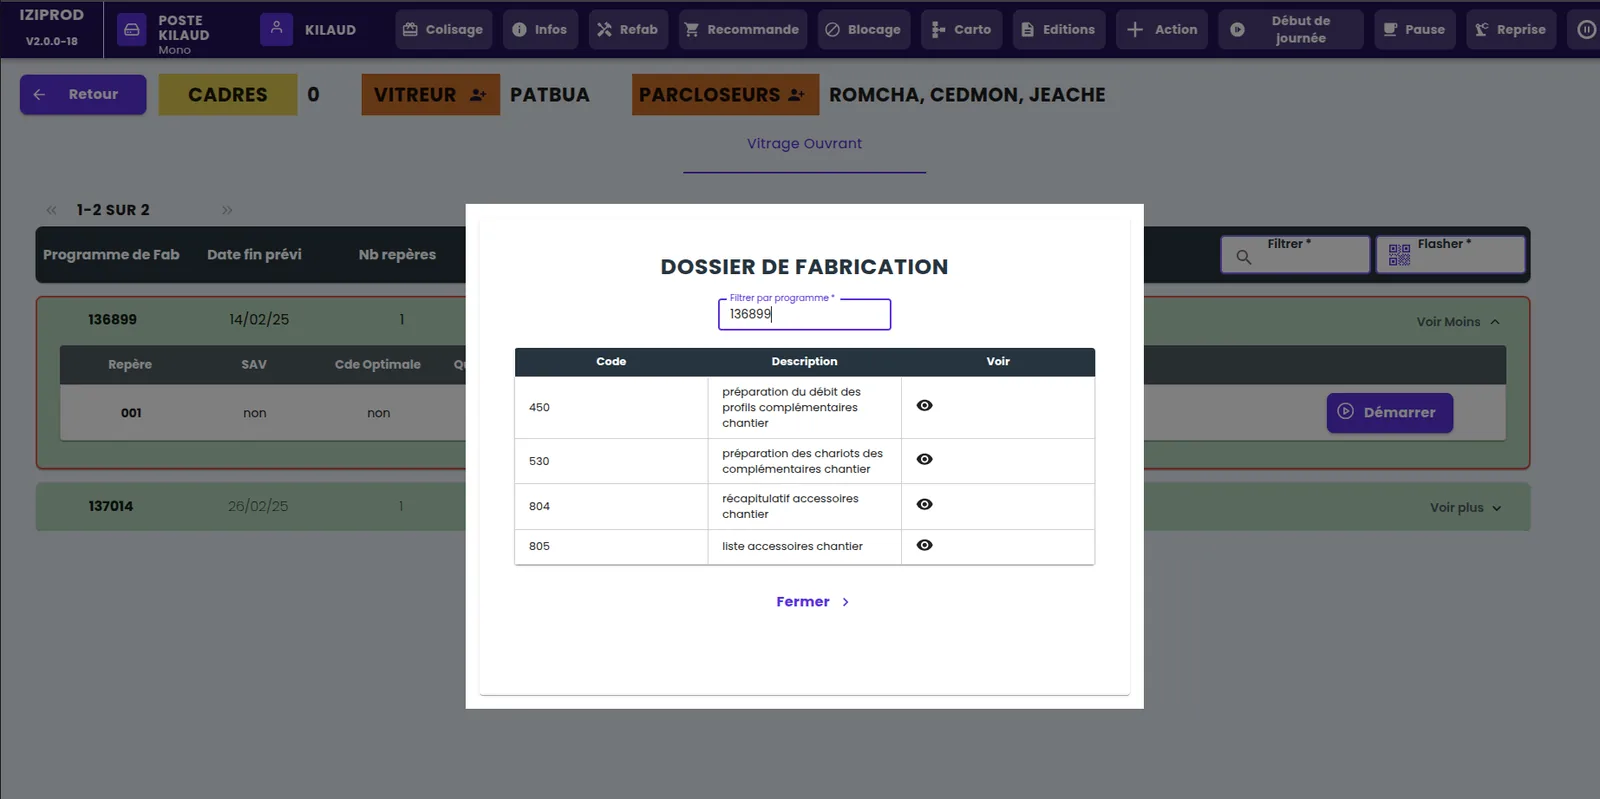
When an operation starts, the operator has immediate access to bills of materials, procedures, diagrams, video tutorials and component locations. Some operations open a dedicated screen, for example hardware fitting and roller shutters.
Step 3: documents, extra hands and quality
The documents needed for each job open automatically, and the full production file (current order and part, all technical sheets) remains freely available at the workstation. An operator brought in to help can be added to an operation, so that their time and labour cost are counted. The quality checks built into the workstations are the subject of a separate case study.
Results for the client
Today the client has production workstations that provide:
- more accurate production costs, thanks to actual times per operation and per operator;
- better operator productivity, as they no longer juggle several applications;
- quality monitoring and traceability at the workstation;
- simpler, more ergonomic tools for production.
What we take from this workstation project
Three lessons. First, mapping comes before everything: until the workshop managers have written down the operations and their dependencies in black and white, no screen can be designed. Next, the login mode and the reporting mode are chosen workstation by workstation; a cutting saw and a glazing line have nothing in common, and trying to use a single screen for both dooms one or the other. Finally, configuration beats development: every rule handed over to an administration screen is a rule the client adjusts alone, and a project of this size has dozens of them.
And today: the same needs as standard
This project was custom development. The needs it covers (operator identification by badge, list of manufacturing orders by priority, reporting the start and end of operations, actual times compared with standard times, real-time progress of manufacturing orders) are now covered as standard by Planitrack, which connects to your ERP or works with your Excel files. Request a demo.